No user accounts required for your recipients -
Existing certificates and badges always stay valid


Learn how to create professional webinar certificates and automate their delivery with Zoom, Zapier, and Virtualbadge.io.


Webinars have become an essential part of professional development and knowledge sharing, whether in education, corporate training, or thought leadership events. But once the session ends, how can you ensure lasting impact, recognition, and engagement?
That’s where webinar certificates come in.
Offering a professional certificate at the end of your webinar adds a layer of credibility, reinforces your brand, and boosts attendee satisfaction. Here’s why certificates are no longer optional:
A webinar certificate should do more than state that someone showed up. It should reflect your brand, the value of your content, and the credibility of your organization. To achieve this, certain elements are essential:
The certificate should match your brand’s visual identity—colors, fonts, and tone. With Virtualbadge.io, you can either use a predesigned template or upload your own design and add dynamic fields.
Ideally, this certificate should be automatically generated and sent to all webinar participants—or only to those who meet specific participation criteria.
For further design tips, see the related article: Conference Certificates: Best Practices, which also applies to webinars.
Creating webinar certificates should not require a graphic designer or a developer. Virtualbadge.io offers a flexible, browser-based editor that allows you to create certificates in minutes. Here’s how the process works:
With this setup complete, you’re ready to move on to the automation phase. This way, your certificates are delivered without manual effort.
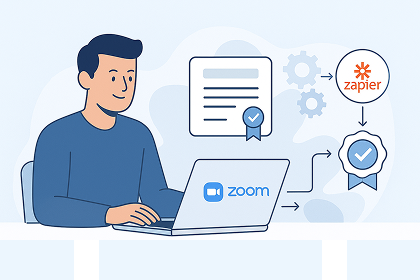
Once your webinar certificate is designed and ready, the next step is automation. If you use Zoom for your webinars, Virtualbadge.io offers a seamless integration that removes the need to export attendee lists or manually send emails.
Here’s how the automation with Zoom works:
Inside the Virtualbadge.io dashboard, you can authorize your Zoom account. This allows the platform to automatically access your webinar attendance reports.
For detailed information use our help article: https://help.virtualbadge.io/article/zoom-integration
Define when a certificate should be issued. Common conditions include:
The data collected from Zoom (name, email, etc.) is automatically used to populate the dynamic fields of your certificate template.
As soon as the webinar ends and the report is available, Virtualbadge.io will issue and email each participant their personalized certificate.
Each certificate includes a unique link that leads to a branded validation page. Participants can download their certificate or share it directly on LinkedIn.
For full instructions, refer to the dedicated article:
How to Automatically Issue Certificates After Your Zoom Webinars
This automation saves time, eliminates errors, and ensures participants receive their certificates while the event is still fresh in their minds.
Not using Zoom? No problem. With Zapier, you can connect virtually any webinar platform—like Microsoft Teams or Eventbrite—to Virtualbadge.io and trigger certificate delivery automatically.
Zapier works as a bridge between apps. By creating a “Zap” (an automated workflow), you define the conditions under which a certificate should be issued.
Let’s say you host a webinar with Microsoft Teams and use a registration form with Google Forms. Your Zapier workflow might look like this:
This setup can be customized for:
Best Practices
With Zapier, the possibilities are nearly limitless. You can automate across tools without writing a single line of code.
Creating and automating certificates is not just about logistics—it’s also about experience and branding. Here’s how to get the most out of your certification process:
Start issuing branded, verifiable webinar certificates in just a few clicks.
Connect your webinar platform, design your certificate, and let automation do the rest.
👉 Try Virtualbadge.io for Free or Book a Demo
* You can find the organisation ID in the URL when you access your LinkedIn Company page as an admin.


Marketing
Aug 6, 2025
5 min
Use Virtualbadge.io to design and send digital certificates that create trust - in less than 10 minutes.