No user accounts required for your recipients -
Start your 7-day free trial now!

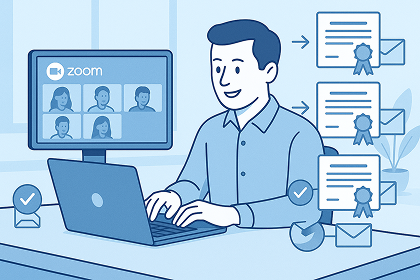
Save hours of manual work by setting up seamless, automated certificate delivery


Zoom webinars are a core tool for training providers, first aid schools and universities. They connect you with dozens or hundreds of participants in real time. For many, a certificate is more than just a piece of paper — it’s proof of attendance, a credential for career growth, or a requirement for compliance.
But sending out certificates after the webinar often turns into a hassle. Manual processes are slow, error-prone and drain your team’s time. Worse, delayed or incorrect certificates can damage your reputation and frustrate your attendees.
Automating your certificates ensures that participants walk away with a professional, branded proof of completion right after your session ends. This article shows you how to achieve that — saving hours of manual work while strengthening your brand.
You’ve likely faced these typical headaches if you’ve issued certificates by hand:
✅ Spreadsheet chaos:
After your webinar, you export participant lists from Zoom. Manually matching names and emails eats up valuable time.
✅ Typos and mismatches:
Copy-paste errors or misspelled names sneak in. You might even miss someone completely.
✅ Unimpressive design:
Standard PDFs rarely include your logo, brand colors or instructor signatures. That’s a missed marketing opportunity.
✅ Delayed delivery:
By the time you finish the process, days may have passed. Participants are already focused on something else, and the chance to delight them fades.
Especially for educational institutions or regulated training providers, these issues aren’t just annoying — they can become serious credibility or compliance risks.
Imagine this instead:
Platforms like Virtualbadge.io handle this entire process for you. You connect your Zoom account once, design a certificate template to match your brand, and set simple rules (like which webinars should trigger certificates). After that, the system takes care of everything.
This means participants receive their certificates almost instantly, while your team focuses on more important work.
Why switch from manual to automated certificates? Here’s what you gain:
Save countless hours:
No more sorting through attendee lists or generating individual PDFs.
Eliminate errors:
Accurate data flows directly from Zoom, so certificates always go to the right person, with the right name.
Showcase your brand:
Your certificates look professional, carrying your logo, brand colors and instructor details. They’re not just records — they’re marketing assets.
Boost participant engagement:
Quick delivery impresses attendees. Many will proudly post their new credential on LinkedIn, expanding your visibility.
Stay compliant:
Especially in regulated fields, having a secure, traceable process that proves only true attendees receive certificates protects your program and simplifies audits.
You can use these step-by-step instructions but we also have a Video.
Now that you know the benefits, here’s how to set it up in the real world — plus a few best practices so you look polished from day one:
Automating your certificate process after Zoom webinars is more than just a convenience — it’s a smart strategy that saves time, strengthens your reputation and turns participants into brand ambassadors.
Instead of juggling spreadsheets and PDFs, you can impress attendees with instant, professional certificates that proudly carry your logo. That’s time saved, headaches avoided and marketing reach multiplied.
Want to explore how easy it is to automate certificates for your own Zoom webinars?
👉 Check out our full article on digital certificates for Zoom or visit our help guide to set up Zoom integration to get started.
* You can find the organisation ID in the URL when you access your LinkedIn Company page as an admin.


Marketing
Jul 18, 2025
3 min

Use Virtualbadge.io to design and send digital certificates that create trust - in less than 10 minutes.
%20(1).svg)


